Advisors and Student Success Coaches
Why Should Advisors and Success Coaches Use MavCONNECT?
- It provides information about advisees/students you work with that may be struggling in courses.
- It facilitates online appointment scheduling to help manage student appointments that sync with Outlook calendars.
- It allows you to refer students to a variety of campus offices without multiple emails/calls.
- It creates a comprehensive record of interactions, communications, and other outreaches with students that can be reviewed to best support their success as Mavericks.
Your MavCONNECT by Navigate Profile
As an assigned advisor and/or student success coach, faculty and staff have automatic access to connect with their assigned students using MavCONNECT. Setting up available office hours and syncing your Outlook calendar with MavCONNECT are the first steps all advisors should take in MavCONNECT. The information you provide will be used by students to help them connect with you via your preferred method.
Learn More All Done!your Profile
Your basic profile information is imported from our Student Information System (ISRS) based on your role(s) at the University. You may have multiple roles assigned to you (e.g. Professor and Staff) and are able to add a profile picture to your account.
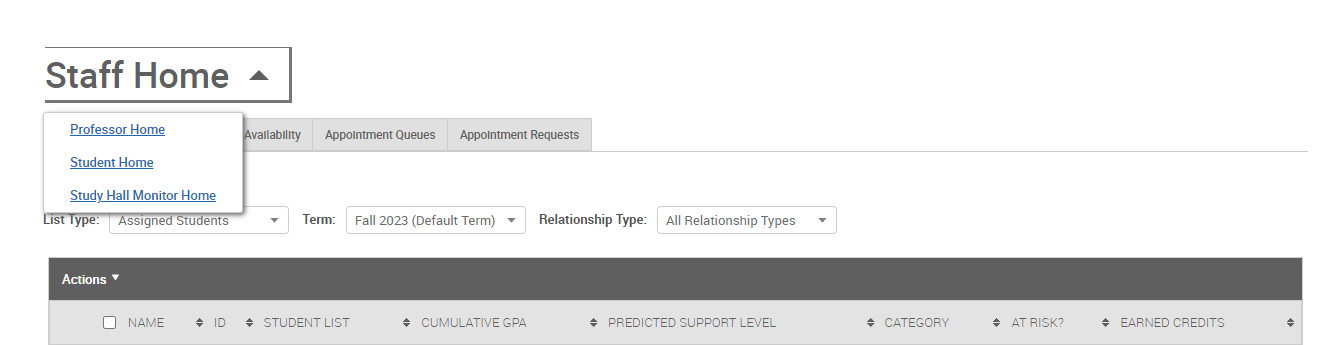
Upon logging in, you will be sent to your default home screen. If you need to navigate between different roles (and are assigned different roles), you can click next to the role name space on the top-left of your home screen.
Adding a profile image to your profile
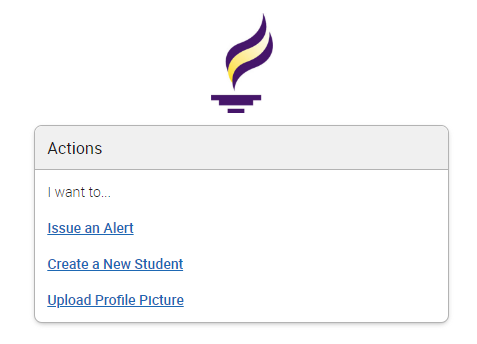
1. On the right-side of your home screen, find the Actions box and click on "Upload Profile Picture".
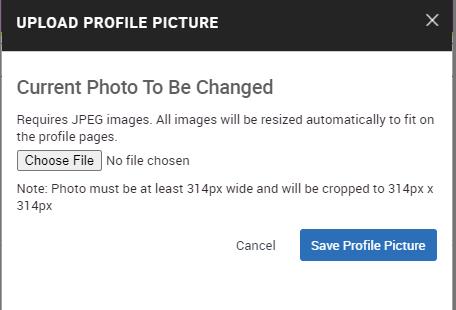
2. Select an image that you want to upload that is in a JPEG format and is at least 314px wide.
3. Choose File to load the picture and click Save Picture.
Scheduling Office Hours
Make advising appointment scheduling easier for you and for your students! MavCONNECT allows you to establish and control your availability to meet with your students when and where it works best. MavCONNECT can also be set up to sync with your University Microsoft Outlook calendar so you only need to go to one tool to manage your schedule.
Learn More All Done!MavCONNECT and Microsoft Office Calendar Syncing
MavCONNECT appointments will always be sent to your Outlook calendar via appointment invites so you are aware when appointments are scheduled; however, if you want MavCONNECT to read if you have busy times on your Outlook calendar and block off your availability in MavCONNECT to avoid double bookings, you'll want to request your calendars to be synced.
Email us at mavconnect@mnsu.edu to request your calendars to be synced. Please included your techID or StarID in your email.
NOTE: If you used calendar syncing in a previous version of MavCONNECT, your syncing permissions should still be available in MavCONNECT by Navigate. Follow these directions to re-establish calendar syncing.
Establishing Your availability/Office hours in MavCONNECT
You can control who has access to your listed office hours within MavCONNECT based on your appointment types/reasons and role at the University. Term-to-term faculty/student and ongoing assigned advisee/advisor are two examples of current University connections.
The easiest way to set up office hours in MavCONNECT is to use the My Availability button that is located on your Home Screen in MavCONNECT.
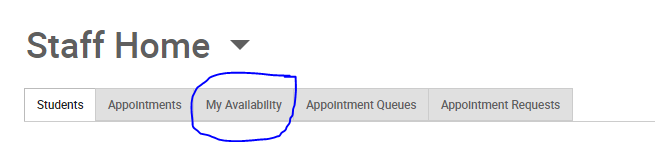
- Click the My Availability button on your MavCONNECT Home
page. This opens your Availability tab. - Under the Available Times header, click on the Actions drop-down to find the "Add Time" option.

3. Select the days as well as start and end time in the From and To fields. Best Practice Tip: If you have multiple office hour days per week, it may be best to set up one day's schedule at a time. This helps you avoid accidently canceling all office hour dates down the line if you need to adjust one specific day/block.
4. Set the length of the availability with the How Long Is this Availability Active? field.
5. If you want this availability added to your personal availability link, select Add This Availability to Your Personal Availability Link? You can put the personal availability link in an email or text or on a website. Students are taken to a scheduling workflow that has the staff/faculty’s chosen availabilities pre-filled. (Note: Personality Availability Link only works for regular Appointments, not for Drop-in’s and Campaigns)
6. Select your Availability types. You can choose more than one at a time. For example, an availability can be for both Drop-In and Appointments. Best Practice Tip: We recommend that you separate Appointments and Drop-in times into different availability blocks as it will provide more accurate "Drop-In Availability" from the student view.
7. For Meeting Preference, select the applicable meeting modality.
8. For Care Unit, select the Unit relevant to you (i.e. for Professional Academic Advisor => Professional Academic Advisor, etc.)
9. Choose the location where you will be available.
10. Select services you can provide students during this availability. You must choose at least one service, but can pick more.
11. In the URL / Phone Number field, add your meeting link for your appointments or your phone number as desired. Can be left blank.
12. Use the Special Instructions box to include additional details for students. (Example: For zoom appointments please use the following link: XXXXXX. For in-person appointments, please come to the XXXX Advising Center and check in at the front desk OR We will use Zoom for our meeting, which you can access by using the link provided. Virtual meeting spaces allow us the flexibility to connect from various spaces. Please ensure the space you are in is conducive for such a meeting. I very much look forward to meeting with you!)
13. If you want to hold group appointments, you can specify the number under Max Number of Students per Appointment. Otherwise, you can leave is as 1 for one-on-one appointments.
14. Click the Save button.
15. Repeat this process until all your availabilities have been defined.
• You can have as much availability as needed.
• Creating multiple availabilities will enable you to set aside specific blocks for specific services (registration advising for example) or meeting types (drop ins vs. scheduled appointments)
Navigating Student Profiles
A student’s profile in MavCONNECT includes academic information imported from our student information system (ISRS), as well as items like meeting history, contact notes, and alerts. Although ISRS is considered the authoritative source for a student's academic record, the student folder makes accessing basic advising information quick and easy. The permissions to see information for each student's profile are determined by your MavCONNECT roles and connections.
Learn More All Done!Finding a Student Profile
1. Login to MavCONNECT
2. Enter a Student’s Name or TechID or StarID in the Quick Search box. Best Practice Tip: Using TechID or StarID ensures you pull the right student's record.

3. When the student you want to view pops up, click on their name to open their profile.
Navigating the Student Profile
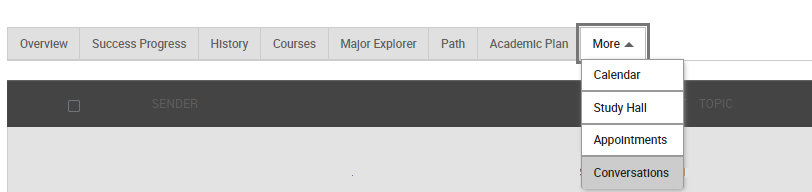
- The Overview tab displays a quick snapshot of a student's academic performance and progress to date.
- The History tab displays recorded appointments, alerts, reminders, and progress reports.
- The Courses tab displays current term course information, enrollment history, grades achieved, and credits earned.
- The Major Explorer tab displays the current major information for the student and related career pathways/jobs.
- Click on More to see Appointment tab (tracks appointment information) and Conversations tab (tracks communications that were sent through MavCONNECT to the student).
Filtering Student Lists
In MavCONNECT, you may be connected to multiple different groups of students based on different roles/connections you have on-campus. For example, you may see a list of your assigned advisees, general student contact lists, and/or no students at all on your Staff Home screen. Advanced Search in MavCONNECT allows you to find students who meet particular criteria to allow you to target your outreach/interactions.
Learn More All Done!Important Search Notes:
- Student data pulled in MavCONNECT should be used within MavCONNECT. If there is something that you feel you need to pull that you plan to use in a different system (Outlook, 3rd party systems, etc.), contact mavconnect@mnsu.edu prior to downloading any data to share details on your project so we can support your need.
- There are options to save searches so they update overnight. More details are available on our Advanced Search quick guide.
Using Filters
- Log into MavCONNECT.
- Click on Advanced Search (looking glass icon) on the left navigation menu.
![]()
3. Identify the search criteria you want to use. Common search criteria/filters include the following:
- Student Information: Use this group of filters to search for students by personal identifying information, such as name, ID, category (campus groupings), or tag.
- Enrollment History: Create logic statements to search for students by their enrollment status in a variety of terms.
- Area of Study: Combine elements of this filter to search for students based on areas of study, including college affiliation, degree, concentration, or major. Note: Minor information is still being built for this system and anticipated to launch in late 2023
- Performance Data: Search using these filters to segment student groups by GPA, credits earned, and hours attempted.
- Term Data: Select conditions within this group of filters to run a search for students using information associated with a specific term. Note: It is important to remember that any additional filters you select within the Term Data bucket are associated with the term you have selected. The students who return in the results will fit the parameters of your search, but their current data will display.
- Course Data: Utilize this group of filters to query students based on courses, section, and status.
- Assigned To: Enter information into fields in this bucket to pull lists of students with specific relationships to a staff member or students lacking that relationship.
Advanced Search FAQs
I tried searching for a list of my students, but I didn’t get any results. What happened?
It could be how you built your filter or it could be based on your connection/role with the students. Clear out your search and try again. If you continue to get errors, contact mavconnect@mnsu.edu and a system administrator will reach out.
I am trying to search for a list of students, but don’t see the data I need in the search options.
Contact mavconnect@mnsu.edu with the data you are using to try to search for students. A system administrator may need to assist with your data pull depending on the criteria you are using.